
rsyslog centralized logging


First of all logging is really important, and are a critical part of any system, they will give you insight into what a system is doing as well what happened.
Virtually every process running on a system generates logs in some form or another. When your system grows to multiple hosts, managing the logs and accessing them can get complicated.
Searching for a particular error across hundreds of log files on hundreds of servers is difficult without good tools.
A common approach to this problem is to setup a centralized logging solution so that multiple logs can be aggregated in a central location.
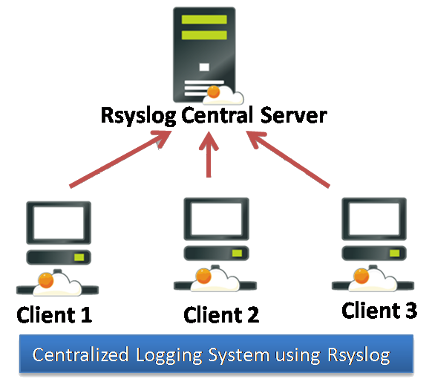
Most people use rsyslog or syslog-ng which are two syslog implementations. These daemons allow processes to send log messages to them and the syslog configuration determines how the are stored. In a centralized logging setup, a central syslog daemon is setup on your network and the client logging dameons are setup to forward messages to the central daemon
Step 1 - Installation
If you don’t have rsyslog on the server for any reason you can install them easily.
RHEL/CentOS systems
yum install rsyslog
Debian
apt-get install rsyslog
Step 2 - Configuration
So what we need is for us to configure a server that will receive all the logs from remote servers, and configure the clients to send the logs to the server.
Lets configure the server first.
The configuration file is found in /etc/rsyslog.conf, open it with your favorite editor, and lets edit the file, and we need to decide if we gonna use TCP or UDP, if you are not sure, just stick with TCP.
If you want to use TCP, add the following lines in /etc/rsyslog.conf
$ModLoad imtcp
$InputTCPServerRun 514
As for UDP
$ModLoad imudp
$UDPServerRun 514
Yes one can have both UDP and TCP requests on same port as each connection is identified by ( source IP ,Destination IP, Source Port, Destination Port, PROTOCOL) as protocol can be TCP or UDP both connections can be differentiated.
RHEL/CentOS systems, Debian
service rsyslog restart
Now let’s check if the server is listening on the ports we have specified.
TCP
$ lsof -i :514
rsyslogd 7004 root    5u  IPv4 118878      0t0  TCP *:shell (LISTEN)
rsyslogd 7004 root    6u  IPv6 118879      0t0  TCP *:shell (LISTEN)
UDP
$ lsof -i :514
rsyslogd 7004 root    5u  IPv4 118878      0t0  UDP *:514
rsyslogd 7004 root    6u  IPv6 118879      0t0  UDP *:514
So as you can see now we have rsyslog listening on both TCP and UDP on the port we have specified.
Lets configure the client now.
All you need to do, is just add the server to where you want to forward the logs.
*.*   @@Primary rsyslog server:514
*.*   @@Other Primary rsyslog server:514
What this does is, it sends the all the logs to both servers specified in the config file (/etc/rsyslog.conf)
You can use a selector for defining what logs you want to be sent.A selector processes all messages it receives (*.info;mail.none;authpriv.none;cron.none), and tries to forward every message to Primary rsyslog server
Another thing you can do is, add failover capability to your logging, but this will only work if the server is configured in TCP mode
/etc/rsyslog.conf
*.info;mail.none;authpriv.none;cron.none  @@<Primary rsyslog server>
$ActionExecOnlyWhenPreviousIsSuspended on
&@@<Address of secondary rsyslog server >
&@@<Address of third rsyslog server >
& /var/log/localbuffer
$ActionExecOnlyWhenPreviousIsSuspended off
So what happens is, if the primary rsyslog server cannot be reached, it will try on the secondary, and if the secondary can’t be reached it will try the third, and if the third is not reachable, it will write the data to /var/log/localbuffer, ideally we would never ever have to write to this file.
Step 3 - Firewall and SE Linux on the Server
If you are using SELinux you will have to allow traffic, just replace protocol with the correct one tcp, udp.
semanage -a -t syslogd_port_t -p <protocol> 514
If you are using iptables for firewall you will have to allow, correct one tcp, udp.
iptables -A INPUT -m state --state NEW -m <protocol> -p <protocol> --dport 514 -j ACCEPT
So there you have it, now you have your logs in a singular place.
Having everything in one place will allow you to run a really nice tool like ossec.
In a future article I will take a look at other mechanisms for transferring logs.